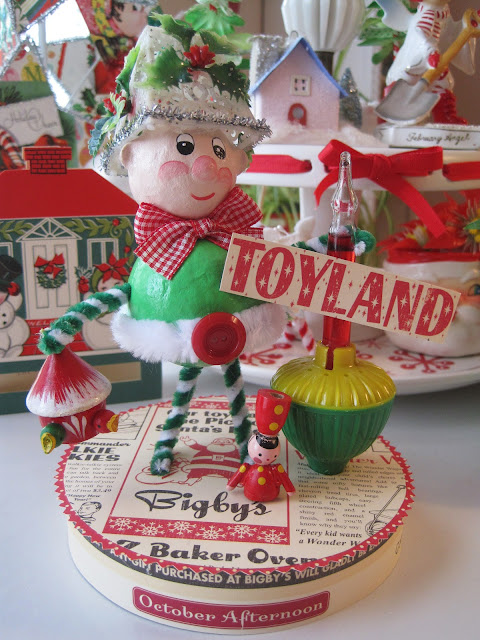
Don't you just love visiting one of your favorite crafting friends and finding they are sharing their creative process with you? I always come away with great ideas to incorporate into my own work pattern. I thought I would share my process with you today and tips I have learned that have helped me greatly.
BASIC ITEMS GATHERED
On this day I know that I am going to make paper clay items. I have arranged the Styrofoam shapes by the characters they will become. I have gathered items that are essential to making the items such as sticks for shakers, ice cream cups for snowmen, pipe cleaners for elves, and felt for owls.
With each step of the craft, I will work until my desk is cleared of supplies. Being able to see the beginning and end of a step helps me stay focused and know there IS an End in Sight! All shapes are covered with paper clay,
and set in front of a small fan to dry.
COLOR
I believe color is the easiest guide to follow when you are not sure what your finished project will look like. I don't care a whit about pattern, it's all about the color.
Meri, ImagiMeri, gave me this beautiful rusty red paper napkin that I just knew had to become a fall craft. I looked at my supplies for items that would go with this color. A brown fishing card and brown striped legs are a perfect start.
I knew I was on the right track when I made a party hat out of the napkin. A tag on the card wishing Dad a Happy Birthday sets the theme for the craft. I have gone through this process with each character and have gone ahead and made each of their paper stands. Next it is time to
PAINT
A must purchase for all your painting needs is a large round brush for covering large areas, a medium flat brush for shading (cheeks) and a package of liner brushes. TIP draw your LEFT EYE first if you are right handed. It is so much easier to copy on the right side. This also applies when stitching. PAINT WHITE FIRST, BLACK LAST. You can paint white over your pencil drawn eyes, the lines will show through.
EYES
There is just no way around them! TIP don't worry about mistakes made painting with black. You can thin lines with adjoining colors. (Note orange and white paint) Everything is now painted, my craft table is clear once again. It is time to plug in the glue gun.
TELL A STORY
With all my characters glued on their bases, it is time to tell their stories. The theme for this year's holiday crafting is City Sidewalks. I have been imagining all the goings on at Bigsby's Department Store. I can't keep up with the ideas this scenario conjures. There are so many positions to fill!
Elves to assist customers,
Elves in charge of Departments,
to sidewalk Elves ushering in customers.
But back to my little owl. Oh my gosh, he tells his story beautifully. My husband loves to feed the birds, and he loves to fly fish.
REPEAT YOUR CRAFT
Favorite crafts made can be interpreted for every holiday!
From my spring colored owls to fall owls, from Boo pumpkin to Boo shaker, these are TOO Cute for words! I absolutely love them. It's now time for my very favorite task step,
PHOTOGRAPHING
SETTINGS
Most of your craft room photographs will use the MACRO setting, FLASH OFF. A mistake many make on their blogs is depressing the button right away. ALWAYS lightly push button, HOLD as you hear motor whir, DO NOT COMPLETELY COMPRESS BUTTON UNTIL YOU HAVE THE SHOT YOU WANT. You can hold the button or let it go and start again without actually taking a picture. Learn this, and you will be amazed at the photographs a simple camera can take.
BREAK IT DOWN


