

I am so light of heart today. The sky is as blue as can be from my craft room window, and the grass is .... well the grass is green! Not a smidget of snow to be seen anywhere. The perfect day to respond to a readers request for a pom pom tutorial and a pattern how to.

I learned to make pom poms in Mr. Gardner's sixth grade class from popular girls sitting close by and make them in the same way to this day. Whatever will I do if they stop making cereal boxes? Two circles cut per pom, one slightly smaller for head pom.

My Halfway Woods best friend and I would make them by the dozens on Spend the Night days. Two yards yarn length repeated until amount equals six strands. Wrap around cardboard keeping six strands separated from each other and flat against cardboard. Another length of six strands will be needed.
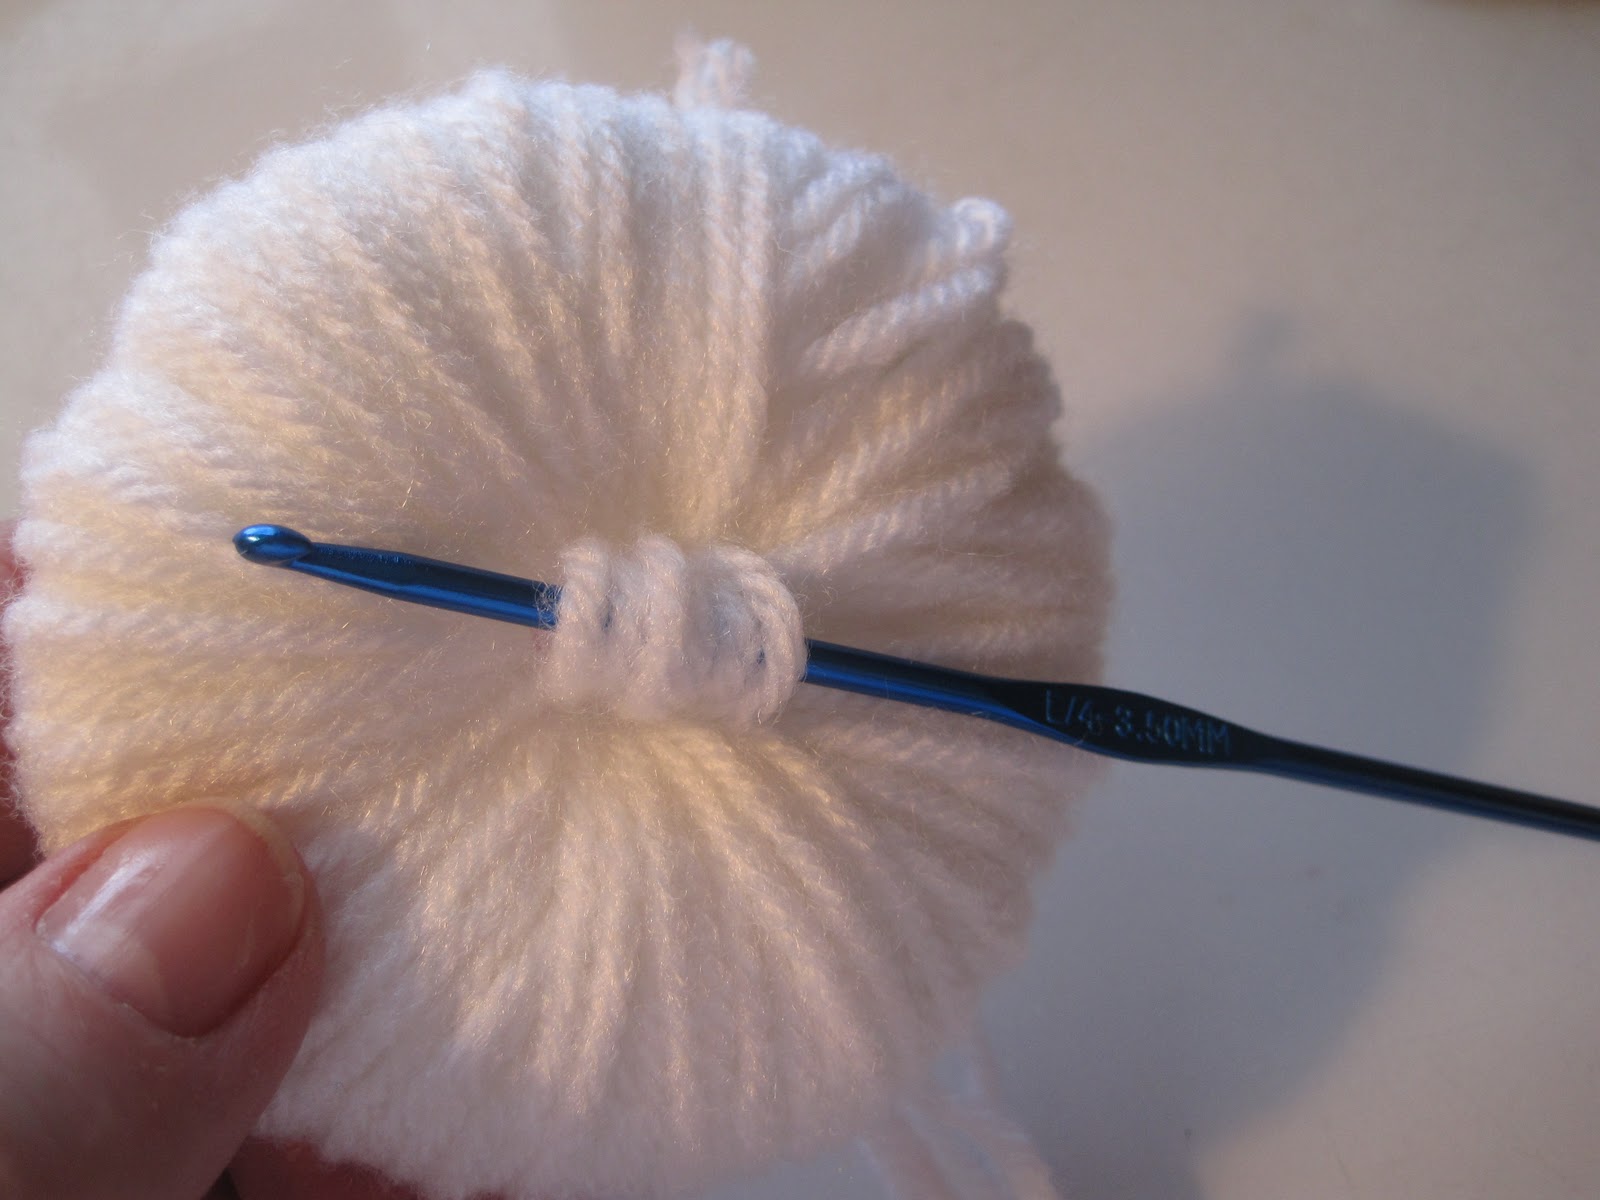
Our mother's hairdresser Miss Bernice sold our pom pom creations in her shop. This afforded us money to purchase more yarn to make more pom poms. A crochet hook makes pulling yarn through center easier as opening becomes smaller. When you can no longer pull yarn through, pom is ready to for next step.

Our pom making days would come to an end by the last day of the school year. Sherry would move to Washington state with her family. Heart broken letters to each other would be signed Hannibal Hays and Kid Curry for the remaining years of our childhood. Large scissors are used to cut through layers of yarn.

Sherry and I have now written each other for forty years. A length of yarn is inserted between cardboard rounds and tied snugly against yarn, repeat several times.

Sherry and I both were young women wanting to keep our world small. We would both meet the loves of our lives at about the same time. Sherry would meet Tom who happens to be a paraplegic, and I would meet Pat. Cardboard is removed. Trim pom to shape. Make second pom for head using same steps.

Sherry would be inspired to attend nursing school from her years of assisting Tom. It seems our lives have been lived in parallels. We both are employed in fields helping individuals with challenging disabilities. Poms are tied together with one strand of yarn from each. Repeat with second strand.

Do you think it is by chance we should each live at opposite sides of the Halfway Woods? A final trimming, and this little pom is ready for his uniform.

WARNING: Individuals who have received one of my pom pom characters in the mail always remark how surprised they are by their very large size. The lower body pom alone is larger than this medium sized pom character.

At this point the little bird can be done and be what I call a Snowbird. His feet, of course, are hidden in the snow!


Legs are created by twisting two pipe cleaner stems together for sturdiness. Half inch width of felt is wrapped around stem and held in place by twining floss around length and anchored at feet with several knots. Correct foot size is again determined by using jacket front piece. Edges are blanket stitched together. Foot slipped in before last stitches are taken.

Oh my pom pom birds hate this step! A "U" shape is created with legs and hot glued between separated yarn. A thing stream of hot glue is applied on exposed "U", yarn pressed together to hide unmentionables.

Handsome!

25 comments:
This I will try for sure! My birthday is on St. Patrick's Day and I'll make one as a present to myself. Thanks so much for the pattern and instructions!
Oh E ~ your pom creations are always so animated! I love the outfits you make for them. I'm glad your spirits are up...it is the longer days of sunlight that helps me! We still have some little splotches of snow, but I have noticed that my Krokus are sprouting:D
Happy Weekend,
Julie
Your outfits are what make your creations so special. Thank you for continuing to inspire!
PS. I'd love to see green grass again. Another storm is on it's way bringing more snow and ice! I think I'm going to hide in my craft room tomorrow and play with pom poms.
OH. MY. GOSH!!! How adorable is this!!! Elizabeth, you create the most charming things!...Thank you so much for this great tutorial...and the lovely story you told along the way! I loved it! xoxo Paulette :D
Hey Sweet Lady,
Your St. Patricks Day pom pon bird is wonderful, very happy. I so love the joy you find in creating E, and thank the Gods above you're generous of heart and share your talent. I'll always be in awe of you girlfriend.
Love ya'
Meri
E,
So glad the sun had come out and the snow is gone....
This one is as sweet as all of the other wonderful little pom pom creatures! Love his green! I really like the yellow one too! I am so happy you found your friend on FB.....it is raining here today, and snowing up north, suppose to do it tomorrow too..no matter how many sunny days we have, I still don't like the grey ones...:) Thanks for the tutorial! Who knows, I might try it! LOL Sandy
Thanks for the tutorial, I love the look of your pom pom critters. I have a question about your "sandwich method". When you say cardboard do you mean cardboard like the packing box or cardboard like a cereal box? Anyway, thank you for sharing your generous and loving heart with all of us. I love you stories so much!
How cute your pompom friends are. And I loved hearing about your old friend. How wonderful that you still keep in touch. face book is great for just that reason!
Hugs!
vivian
Hi! I have been reading your blog and I am so in love with your creations! Definitely one of a kind. Thank you so much for sharing them all. I will have to try to see if I can make some of them. Just wondering if you ever sell anything you make? Thanks for putting a smile on my face.
Christina
cardinalcrafting.blogspot.com
He is absolutely adorable! I need to decorate for St Patrick's Day...my Irish hubby's favorite day of the year!!
Oh so nice to go from one sweet holiday to the next. Even sweeter with these beautiful birds all decked out to ring in the day. Thanks for sharing...Smiles...Renee
So very cute. You are a wiz at these patterns. Have I told you I have printed them all and keep them in my to-do notebook? Your story brings back memories of crafting with my friends after school. Such fun!
Elizabeth...I got my heart in the mail today. I LOVE it, it is "sew" me!! Thank you. This little pom pom bird just might be my all time favorite. The directions seem easy, and the story was sweet. Thank you for sharing. xxoo Valarie
p.s. I am going to look on ebay for a pom pom maker.
You........are.........amazing!
Thank you for sharing your tutorial. You have created such a delightful world here.
Love your Irish bird - this one is my all-time favorite (could it be my Irish blood). Thanks for the wonderful tutorial - have you every used a pom pom maker? I am wondering if they are really useful or just another gimmick?
auntbeth54 SANDWICH METHOD I always use the word card stock which is plain colored scrapbook paper. Others have also confused this with cardboard which I use when a heavier base is needed. I hope this helps! E
I just love this little bird - and all your pom-pom creations. I am still intimidated by making one, but might just try since you wrote such a good tutorial. I love how you write about your friends in your posts. I made my March tag yesterday - and it was fun to use green paper! Hugs, Patti
What adorable little guys! Your tutorials are sooo good. Thanks for sharing!
Too flippin cute! Thank you for taking the time to create and post a tutorial!
What a delightful new character and a wonderful tutorial to go along. I also liked the way you wove the story around your directions. You are a master of stories elizabeth.....and pompom chicks. (and so dignified the way you handled that delicate hot glue gun issue---LOL)
xoxo
Joyce
He is absolutely adorable!! I can't wait to try to make one. I could kick myself for passing over some yarn at the Goodwill a couple weeks ago, thinking that I don't knit or crochet. Have to keep my eyes open for some more. Thank you sooo much for the tutorial, Elizabeth.
Thank you so much for this tutorial!! I adore your pompom characters and have secretly longed to learn to make them. Can't wait to try!
XO from Dee
This little guy is just adorable!!! Can't help but smile when I look at him! Thanks for the terrific share!
dana
I so love your pom pom birds they are so cute! You are so talented and I love how you share your crafts with us. Thank you
E I wish you could see the mess I have going trying to make my first ever pom pom :) I have yarn and cardboard all over the place, the cats are loving it !! ... thx for sharing all this wonderful-ness :) E
Post a Comment