Showing posts with label Shadowbox. Show all posts

Wednesday, December 5, 2012

Whitman Ornaments in the Mail!


What fun this swap has been to host. I have enjoyed peeking through the cellophane at the cutest Christmas ornaments ever and have wondered at the ones wrapped so that I can't see. So do please visit each blog and enjoy for yourself the art of all these talented ladies.


You will be so excited to unveil your ornament from Chris as each one is vintage sweetness that personifies this most special time of the year. Do you see the little Christmas Seal? I told you so..... VS!!


OMGosh, I nearly cried to unwrap Jenny's ornament of a very favorite holiday movie. Just imagine the time it took to recreate this magical movie in her shadowbox. Just look at the tiny little money! I love this ornament!


What a special treat to have Beth share one of her magical creations with us. Are you smiling at the S&H Savings Stamps?


Did you know you can also spell Sandy, CUTE? Every one of her ornaments is as sweet as this little red gingham church. Wait until you see the clever way she has created the way to hang her ornaments, too cute for words!


How fun are Shirley's, Bigby's Department Store ornaments! Window shopping never looked so fun. I can't wait for you to see the presentation Shirley has in store for you. You will feel as though you have been shopping yourself at Bigby's.


From My House to Your House, I thank you for joining me in this ornament swap; and I wish you a Merry Christmas and a Happy New Year! Elizabeth

Wednesday, October 10, 2012

Seasons Greetings Tutorial


As the leaves fall with the cooling temperatures, I am gladdened to know my favorite season of the year is fast approaching. A most fun project to share with you.


A 7 Gypsies shadowbox (Michaels $19.99 use 50% coupon) that welcomes in the holidays in preparation of the New Year. Gather about your craft desk your favorite vintage images and small trinkets you thought didn't have a Place to Be.


The images you choose to use in your shadowbox should tell a story. I wanted mine to give the feeling of coming in from the cold to unexpectedly find you are in the middle of a celebration. Making a template will make cutting your image so easy.


To give depth to your shadowbox, cut out parts of the images to lift from the background with Pop Dots or hot glue to the frame surrounding each box.


Use scrapbook printed paper to fill in where needed. I will use a Pop Dot behind the little tree and hot glue the the hanging branch to the box frame.


It is such a magical process to create these little scenes of wintery wonderfulness.
 

I purposefully chose my first image to be that of a door, my last image the First of January. A little mushroom added as a symbol of good luck.

 
Divide your shadowbox into units of four. It is important to have a balance of light and dark images. Here the two snow scenes are positioned across from matching nearly white boxes with printing.


Green is the color I chose as a secondary color to red, white, and sky blue. It is not predominate in any of the images chosen. Yellow is the accent color as seen in this little horn blower and poinsettia center as well as the little yellow toy soldier.


My favorite greeting cards to purchase on line are the ones with scenes. I know that there will be a version of the same image on the inside of the card. Here I cut streamers found inside the card to add a three-dimensional look to the box.


This is the second time I have made a shadowbox, the first can be seen here. I do hope you will give this wonderful project a try; and if you do, please share it with me!

Wednesday, July 11, 2012

Vintage Shadowbox Tutorial


Oh My Gosh! I love to make these little vintage shadow boxes. They wonderfully capture milestone remembrances in a most nostalgic way.


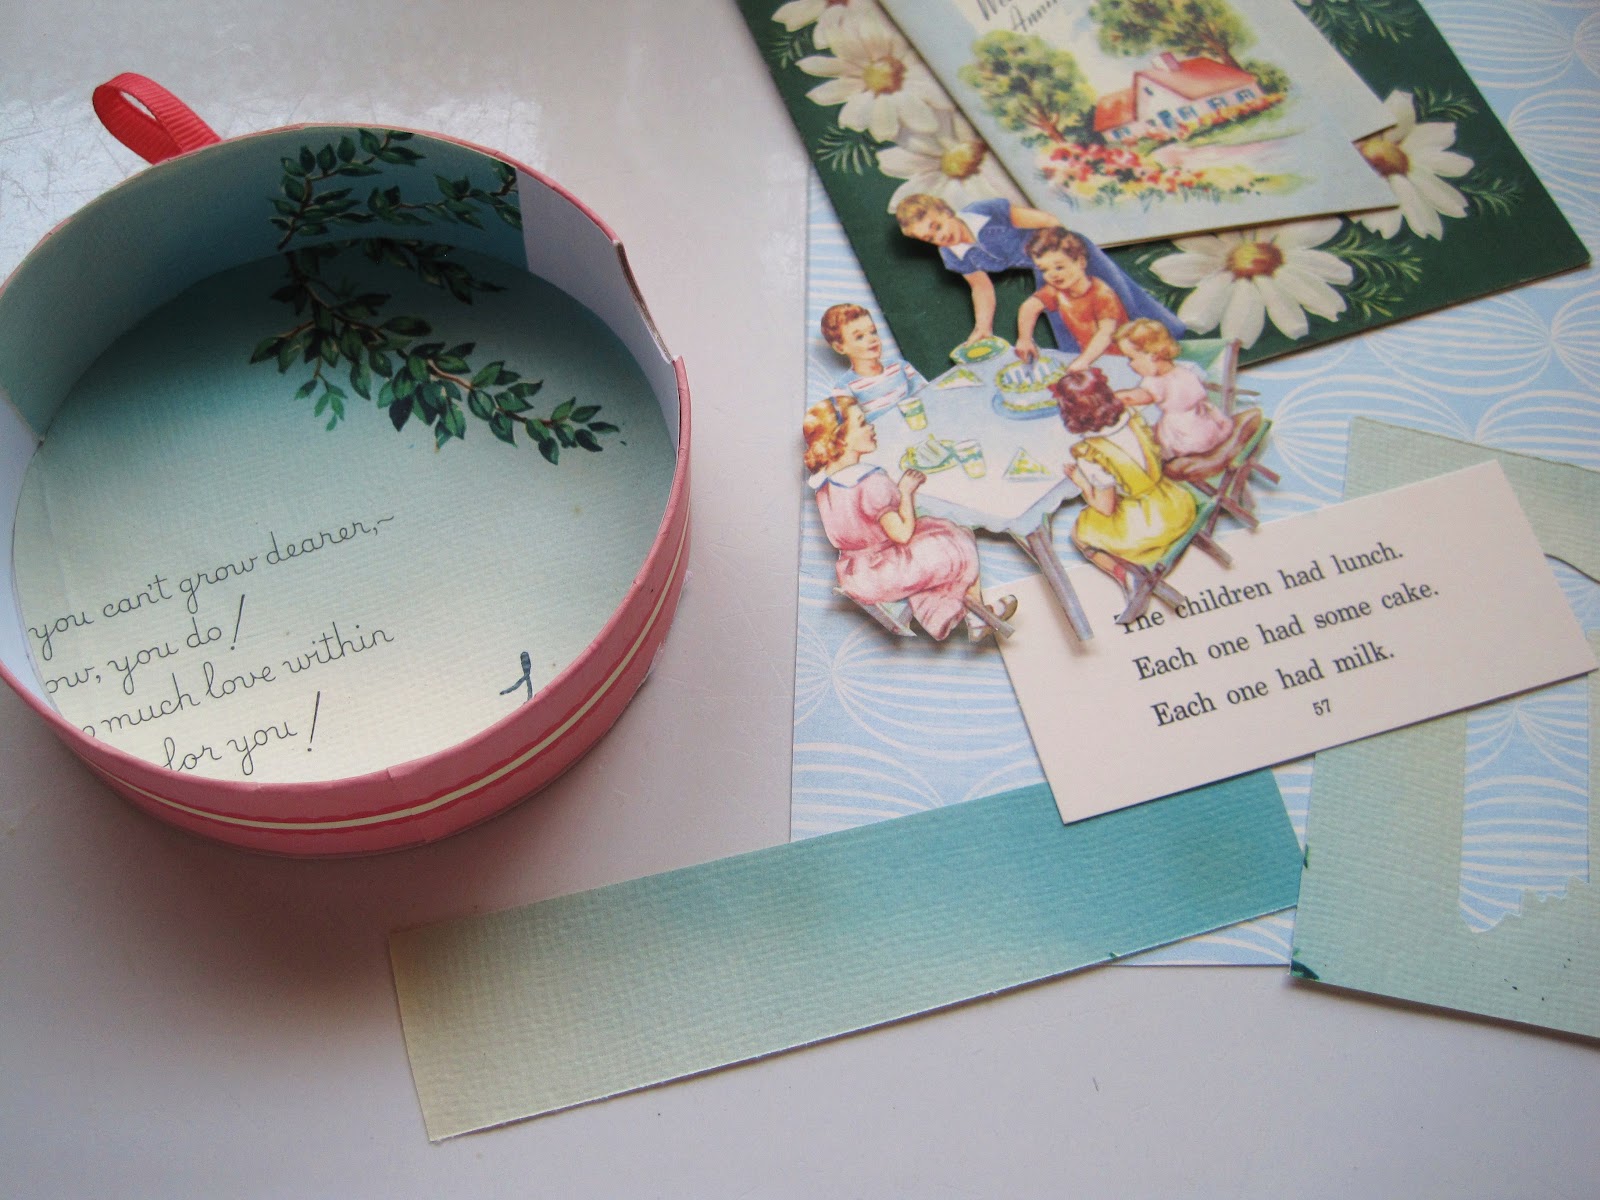
I always check the sale isle for the cute little boxes chipboard letters come in. They have a hanging cord already built in. This month I have used a card from my October Afternoon's Cakewalk Miscellany package and a vintage card that had a beautiful shade of blue on the inside. Images of cute cottages are easy to find on Flickr.


STEP 1. Trace circular shape of  box onto children's party image to match curve of  box. Cut away background.
STEP 2. Trace box onto background image. Cut 1" strips to line inside of box. Glue both in place.
STEP 3. Use two layers of Pop Dots to stand cottage image away from background. (I covered words from card with miscellaneous greenery images.)


STEP 4. Cut strips of paper slightly less than 1 1/4", punch hole for ribbon, glue in place.


STEP 5. Trace box onto patterned paper, pink and glue in place. (I added another card from Miscellany kit)


STEP 6. Apply hot glue to tips of image that will touch box edge, adhere close to front of box. Magical!
STEP 7. Trim edge of box with tinsel, scalloped paper, flowers, etc.


I do hope you will give a go at your own shadowbox ornament. They are such fun, you will not be able to make just one!

Sunday, September 5, 2010

Peppermint Shadowbox


Well here I am on the most beautiful fall September day imaginable happy to celebrate my third year of blogging with you.


Three years filled with stories from the heart and creativity from a very busy wellspring. It seems I can't wait for each new day to arrive as I have discovered this blog is who I truly am.


More than just a Creative Breather, it is the sharing  I have discovered that leaves me at the end of the day pleasantly fulfilled with gratitude that perhaps someone will take away from their visit here an idea that will spark their own creativity.


It seems the mother I have always searched to know has been with me all along. A student by her side has become someone who loves to teach.


Please know how delighted I am when asked, "Would you share with me how..." and then to visit the person's blog and see their own expression of an idea I have shared. Please also know that I learn so much from you as well.


Many thanks for a wonderful three years! Elizabeth


Monday, May 25, 2009

Honeymoon Laundry


The setting up of your own household as a newlywed is such a sweet time. Gifts for a new marriage are nostalgic from the very moment they are seen. Our first two-slice toaster, new linens and fluffy towels. Each carefully put in just the right spot, each used with care imagining they will last for a lifetime. Our WWII military house had a washing machine, but not a dryer. It was expected that we would use the provided clothesline to dry our laundry.

 
How pretty my clothesline looked with my honeymoon linens drying under the Tuscon sun. Four o'clock, darkening of the skies, the scent of oleander heavy in the air. Rainstorm rushing to bring in my laundry, towels as stiff as plywood. I stacked them like flat cardboard boxes and carried them under my arms. I had to iron each towel to get them to relax.


My daily laundry pattern became a race to get the flat linens off  the line before the coming of rain. I was exhausted from doing laundry by the end of the first month! Their had to be an easier way! Thank goodness a neighboring wife saw me laboring at hauling in my stiff laundry and called over the garden wall, "Fabric softener. You have to use fabric softener!" Honeymoon Laundry a memory treasured by me.