Showing posts sorted by date for query pom-pom. Sort by relevance Show all posts

Tuesday, March 12, 2013

Hold the Phone!


Dear, dear friends, Thank you so much for your encouraging words.  It embarrasses me terribly to draw attention to myself, but I was in such a panic that I would not be able to mail out things promised. By the middle of the night, and a pain pill later, I was able to finish. But HOLD THE PHONE. . .


I believe I have sent two Sailor Ducks to the wrong people!!! Please, if you should read this, contact me at elizabeth.andrus@yahoo.com when you receive the package. I will give you the correct address and send you postage. I am so terribly sorry for this mistake.  Lesson learned, don't craft on drugs!


I am afraid I will need knee surgery for torn ligaments in my knee. How did I tear them, you ask? While using the rowing machine at the gym. I love rowing because it creates the nicest breeze. You truly do feel as though you are on a lake on a warm spring day. SPRING - I know! How cute is Laura's little bluebird!


I am not happy at all to have my crafting interrupted, but I do want to share with you the sweetest Nursery characters that ever were. I am obsessed these days with vintage wrapping paper. Swoon worthy, this sweet baby print!


I do believe this is THE cutest character I have ever made! Oh my gosh! I just love this little stork! (See below for availability)


Thank goodness it's Daylight Saving Time; so my middle of the night finishings weren't as late as they would be had I hurt myself the day before! I plan to make all of my little felt Easter characters as nursery ones to ride along in floats meant just for them. EAK! Look at these little rattle fellas. My most favorite of the vintage nursery characters found on greeting cards.


"Nose to Nose" kisses!


I finally fell asleep needle in hand at 4 o'clock this morning as I sat propped and fluffed and cooking on my heating pad as I worked on my Delivery Pom Pom.


Sigh, Don't you just love vintage nursery items? This deliverer of Good News is waiting for his chariot to arrive in the mail. He needed just the right planter, I can't wait for you to see!


Thank you again for letting me panic "out loud". I have had only a glimpse of the pain many of our dear friends live with daily. It truly is frightening.Thank you again, from the bottom of my heart, for your kindness to me. (A special thank you to Laura, Vintage Bettys for your spring paper egg and Cute as Can Be bluebird!)


Elizabeth Andrus 112 Gibraltar Ct Delaware OH 43015
elizabeth.andrus@yahoo.com 

Sunday, January 27, 2013

A Steel Magnolia


Miss Bernice's home was located at the top of a very steep hill. At the bottom of the hill could be found her place of work which she walked to every day of her working life, Miss B's Palace of Beauty. Miss Bernice had been cutting hair since the age of 17 when she left an abusive husband, her infant son on hip, vowing to make her own safe haven in the world and for any woman needing one as well.


Miss Bernice's shop had but one sink for washing hair and one chair for styling hair, but it had an entire wall of chairs with dryers that could be pulled down low on the head, an enveloping warmth as inviting as the advice her customers came to hear.


It was to this place I came with my mother whether our hair needed cutting or not. It was among these women, at Miss Bernice's direction, that I was allowed to be myself. Installed alongside a counter that held  an ever reached for coffee pot, was a little table that held the things I loved to make. From animals made from PlayDoh to Pom Pom Critters, to Rock People. An envelope would always be waiting my arrival filled with change from Miss Bernice's customers.


From Childhood Days to Newlywed Days to Young Mother days, Miss Bernice would provide the customers for anything my creative heart wanted to share. She also provide the tender advice I was unable to hear from my mother about the affairs of the heart. She would share with me words never spoken to another soul about her struggles as a young woman on her own. Her gentle perspective let me know my blessings were many, my troubles few.


Miss Bernice was a Steel Magnolia before there was a story or a book or a movie about the women who inhabit such a place. It is because of Miss Bernice that all women and men alike are protected from the dangerous carcinogenic fluorocarbons that use to be found in all aerosols. She was the one special woman who cut hair in a shop with only one chair for more than 40 years and who lost her battle with Eye Cancer caused from aerosol hairspray that we are all thankful for today.


Please do not pin patterns on Pinterest.


I forgot to include instructions for tail! A pipe stem is inserted between layers of felt and inserted into a small slit make on the backside of body.


Tuesday, January 1, 2013

Spots Before My Eyes


Oh My Gosh! This is the cutest little ladybug pincushion I have ever laid my eyes on. He seems right at home with my Love Bug, ever ready to deliver Valentine wishes.


Made extra small my ladybug becomes two whose spots have changed to hearts. Oh My Gosh again! These are almost too cute for words. You can modify the magazine's original pattern by shrinking it and eliminating the seam allowances.


BODY:  Blanket Stitch (BS) along one side of Body piece (blue football shape on right) then create a Running Stitch at bottom of BS. Both of these stitches are necessary to turn felt pieces inside out for a smooth seam. Turn inside out.


WINGS: Attach three heart brads by piercing felt. Attach a Wing piece to each side of Body Seam using BS (image on left). Take care in making sure your wing pieces match end to end before stitching. You may need to flip your piece for both ends to meet.


FACE: Attach eye brads and pom nose, stitch smile to Face. ANTENNA: Apply Tacky Glue to length of wire, wrap embroidery thread (3/ornament, 6/pincushion) around wire tying knot at each end to secure. Leave a small amount of wire exposed on one end to insert into small pom. Apply Tacky Glue to center area of face and adhere to body before BS in place.
DOTS: Use Tacky Glue to adhere dots to pincushion.  HANGING CORD: Attach for ornament.
BASE: Cut from cardboard a circle slightly smaller than Base piece. BS Base to Body, leaving an opening big enough to slip in cardboard and fiberfill. Stitch closed.

PATTERN NOTE: You can e-mail me for my Ornament pattern. I can not send you original Pincushion pattern from magazine.


Monday, October 1, 2012

Paper Clay Owl Tutorial


Happy October! Yes! I am still committed to making a Button Keeper for each month of the year. I promise you, as each one makes their appearance, you can't help looking forward to what the next month will hold.


Knowing how busy everyone will be with their holiday crafting, I thought I would combine techniques for my next three month's projects. One might be perfectly perfect for your holiday gift giving.


COVERING LID
STEP 1. DON'T FORGET to hot glue inner lid to ring. The weight of topper will cause ring to      continuously circle jar if you don't!
STEP 2. Hot glue two stacked pieces of cardboard on lid.
STEP 3. Hot glue strip of cardboard around ring, trim.
STEP 4. Trace lid onto cardboard and back of printed paper.


STEP 5. Glue stick printed paper to cardboard, then onto heavy card stock, pink edges. Hot glue on lid.
STEP 6. Cut strip of paper wide enough to cover side of rim, pink edge. Hot glue in place.
STEP 7. Optional - Hot glue decorative tinsel stem, Glitter glue paper circle.
 

October and November's Button Keepers are made using Paper Clay purchased at Michaels, $10.00.


PAPER CLAY - Have a small amount of water available.
STEP 1. Pinch off small amount of clay. Working with your thumb, lightly press clay onto surface of Styrofoam shape pressing outward direction.


STEP 2. Ears or nose are first created as triangular and round shapes than placed on surface of clay. Use forefinger to slightly pull edges of clay to surface creating a smooth appearance.
STEP 3. When shape is to liking, wet forefinger and smooth clay further.


STEP 4. Wings begin as ball shapes, pinch one side between fingers to create teardrop shape. Flatten between thumb and forefinger.
STEP 5. Attach to body surface. Lightly pull edges to surface. Wet finger to smooth.
NOTE: Only small pieces of paper clay can be added in this way. Large pieces need Styrofoam to keep them from being to heavy.
STEP 6. Head is attached to body with use of partial toothpick. Insert pipe cleaner stems for legs and arms.
STEP 7. Leave piece to dry overnight. Paint next day. Pieces also can be dried in front of fan. Note: Climate effects drying time.


Oh my gosh! The tops can be as simple as these and be just as charming as can be.


I know I will create large jar versions next year just because these are such fun to make. Can you see my pom pom skier within the jar topped by an Oh So Cute sparkly snowman? Love it!


TRIMS:
My wonderful snowman's collar was created in the same manner as my October Button Keeper's collar.
STEP 1. Layer seven lengths of crepe. Take a hand running stitch along one edge, pink opposite edge.
STEP 2. Cut between pinks up to running thread.


STEP 3. Create a circle large enough to overhang jar lid. NOTE: I did not need cardboard pieces in center of jar lid because crepe will fill in the area.
STEP 4. Hot glue topper in place.


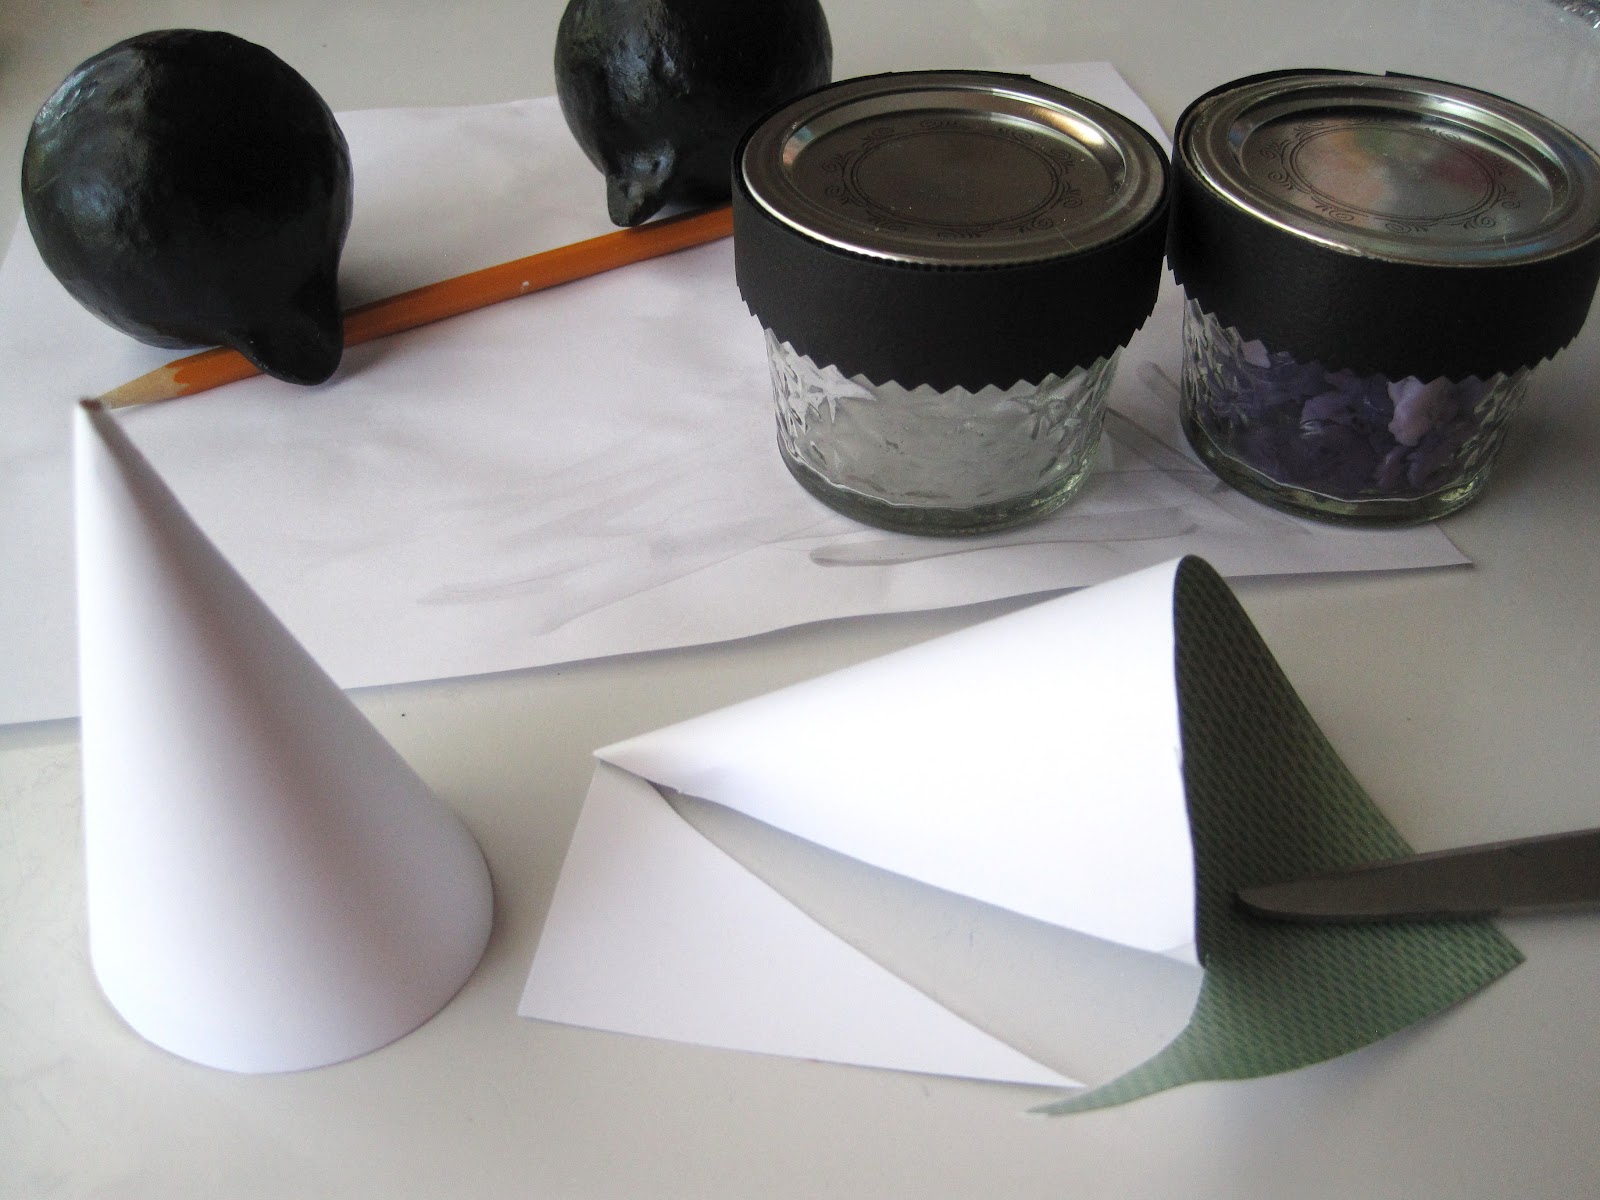
PARTY HATS:  (These steps are for using vintage materials that may be fragile)
TIP:  WIDTH OF PAPER = HOW TALL HAT WILL BE 
STEP 1. Cut width of paper.
TIP:  PULL PAPER ACROSS EDGE OF YOUR CRAFT DESK TO SOFTEN AND CURL PAPER.
STEP 2. Form cone shape.
STEP 3. With hat pinched between fingers, apply bead of hot glue down length where papers meet.


STEP 4. Trim away excess paper. Trim around opening beginning at shorter side. TIP: Keep scissors perpendicular to desk for a straight cut.


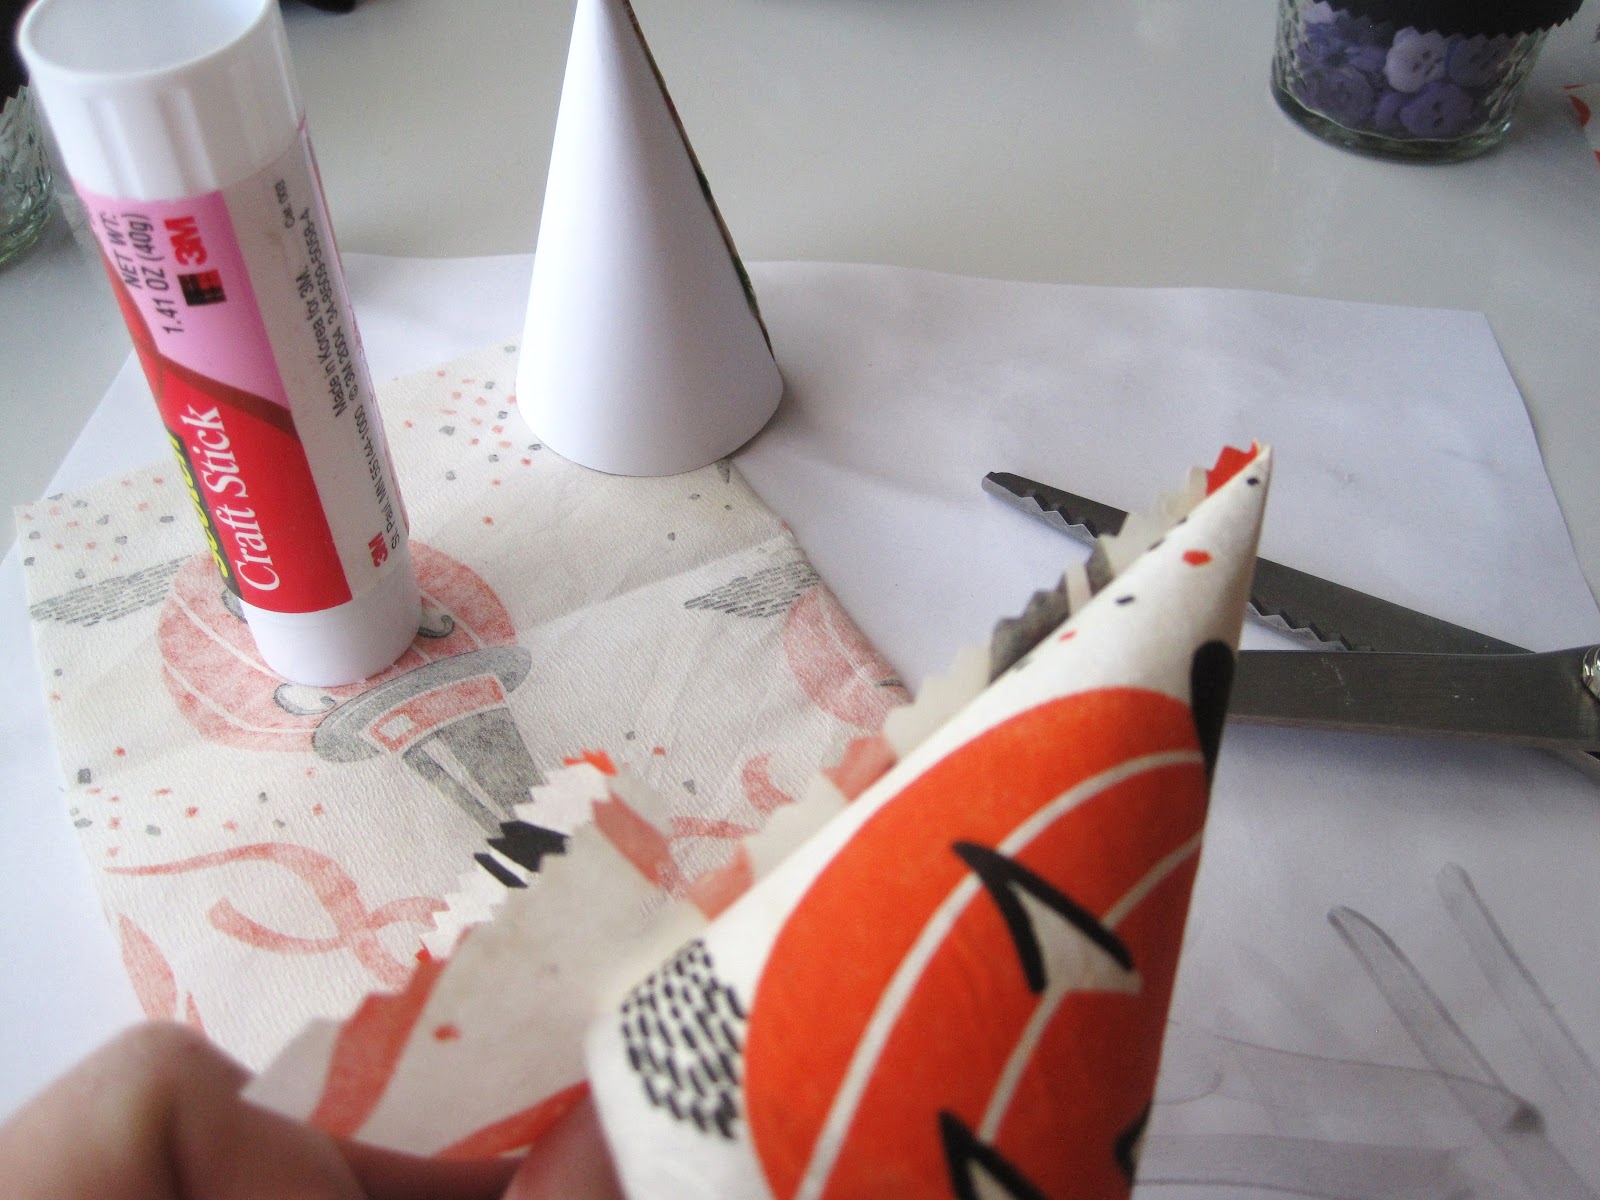
STEP 5. Vintage paper - Cut same width paper as hat strip. Apply glue stick to back of strip. Adhere to base cone. Trim.
STEP 6. Hot glue crepe or tinsel stem to edge of party hat.


A snowman in October? Like I said, once you make one Button Keeper, you just can't stop!

Sunday, September 30, 2012

This and That on Sunday


Thank you so very much for my Birthday Greetings yesterday. I don't know how you knew it was the actual day. I have been celebrating each day of the month of September to keep you from truly knowing. My husband returns from his Home Alone trip today, birthday cake soon to follow!


Speaking of birthday wishes, are you smiling ear to ear over Diane's,  Etsy Shop, Scrabble wishes and kitten? Numbered vintage birthday cards are my absolute favorite.


In other crafting news, "Six white pom poms, 3 wooden beads, 4 orange buttons, etc, etc, etc,"  What a Cute as Can Be way to hold the tiny little items you need for a project. Michaels summer clearance rack, (.49 cents apiece),  Yo Yos and vintage buttons are added by mE.


My gosh, how time is flying by now that fall has officially begun. Even quicker still is my eagerness to visit each blog to see all of your wonderful Halloween crafts. (Pattern found here.).


And speaking of Halloween, have you gotten your Magpie-Ethel yet? May I tell you I have come to a realization about the style of crafting of my favorite artist. IT'S ALL IN THE LEGS! Just look at the stance of this witch, un huh. You can see Laurie standing like this, can't you? Her personality is wonderfully bold.


My characters, on the other hand, all have straight legs. They say about me I am someone who always follows the rules.What do your craft legs say about you?


Vintage Halloween supplies are very hard to find; so What's on Hand came to the rescue again.


A little hot glue does the trick!


How cute are these hanging from my Cutie Pie Cottage garland? And the view outside my craft room window?


Gloriously beautiful on a This and That Sunday!

Tuesday, July 17, 2012

Where Bloggers Create, 2012


Have you been enjoying visiting the craft rooms of the women Where Bloggers Create, 2012 at Karen Valentine's, My Desert Cottage? I don't believe my head found rest upon my pillow until the small morning hours. I so wanted to visit just one more place of inspiration.


To share your creative space is to wear your heart on your sleeve. A glimpse into the core of your true personality and how it finds it's way into your art. The hope for acceptance, the hope for inclusion.


This is the doorway to my heart. This is the way to Creative Breathing.


It all began for me with a Bluebird. An image chosen for my Profile has become the symbol of my blog. I hoped from the very beginning to create a blog that would capture in words and images the way I feel when I look at this sweet vintage Valentine.


If you should peek into my craft room, I hope my Anniversary Hoosier will make you smile. I know it does me each and every time I enter this space.  Found tucked away in an antique mall just waiting for me to pass by, a telephone call to my husband, a delivery the very same day.


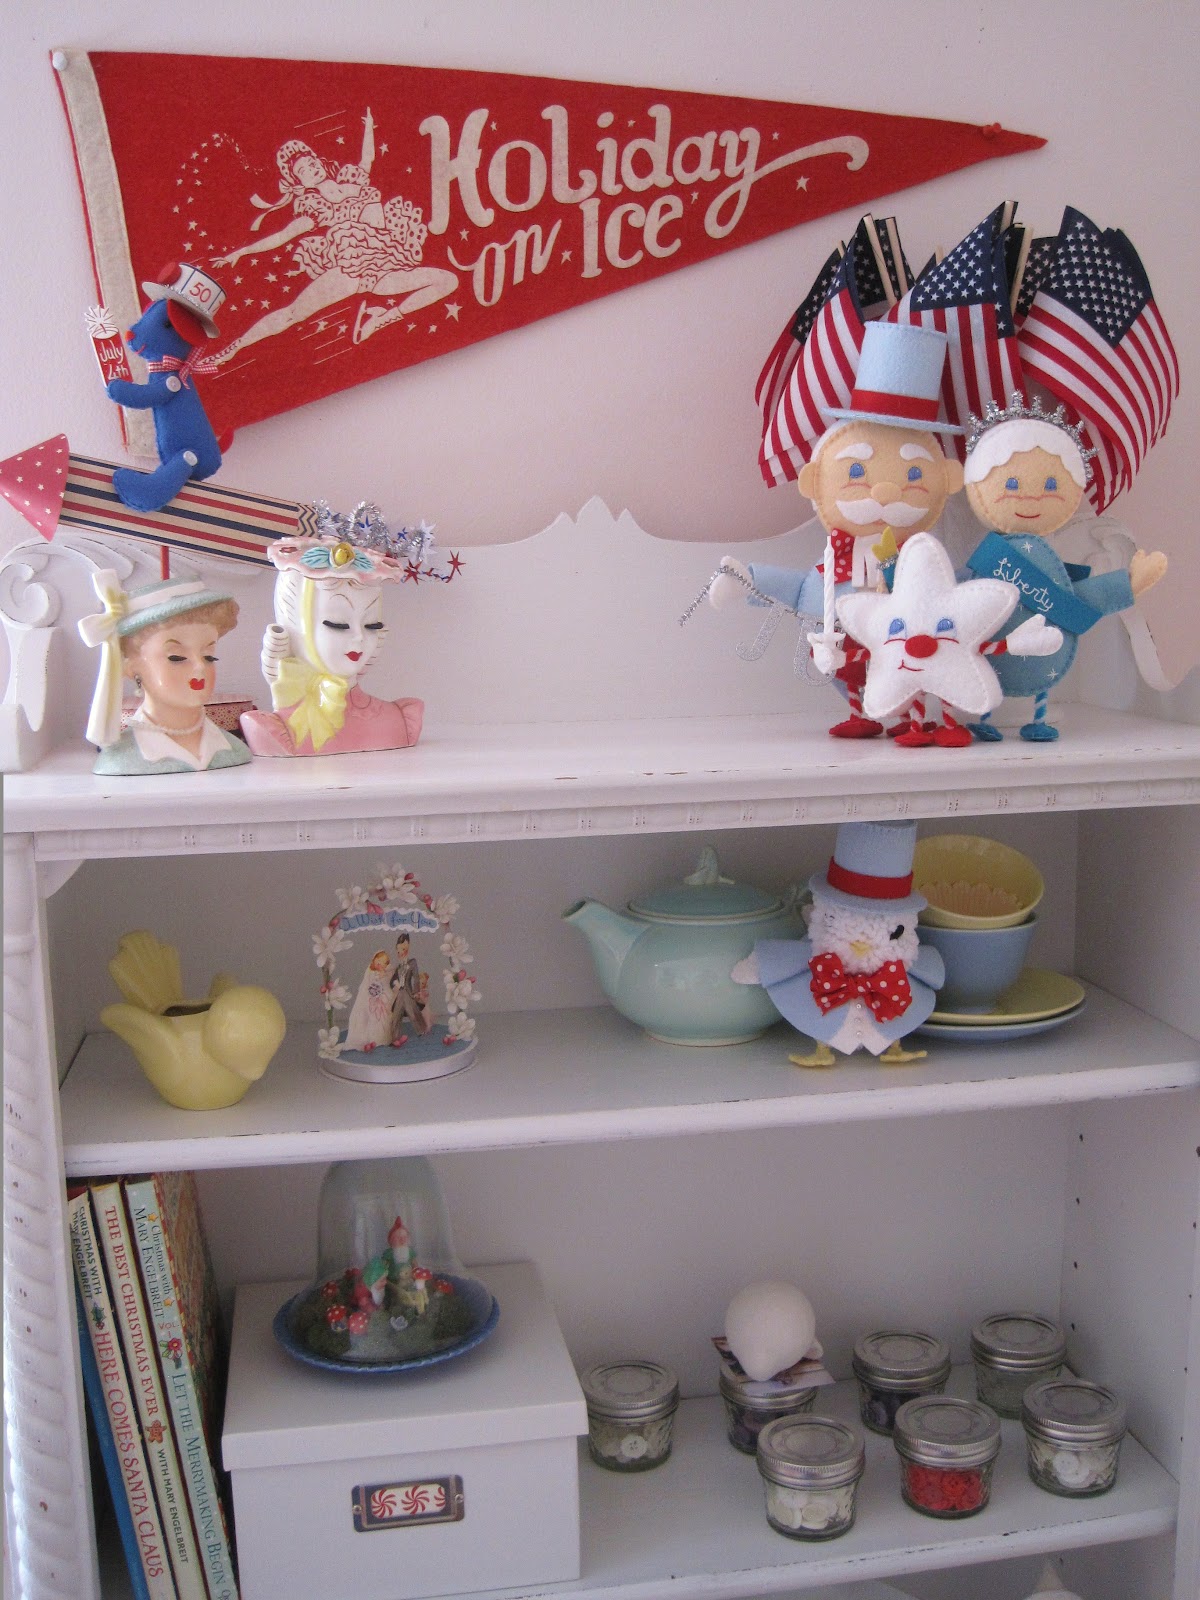
There is always a holiday to celebrate in my craft room. The shelves of my Hoosier teem with the chatter of characters busily planning their own special day. When it's their turn, they appear front and center on the large expanse of enamel gleaming like a polished dance floor.


If it can be said that the Hoosier shelves belong to my characters,


it's drawers belong to mE! On this, I stand FIRM! There would be no Craft Room Characters if there were no pipe cleaner stems.


I am a prolific crafter and can barely keep my craft room stocked with supplies. I never thought I would be a person who could run out of orange pipe cleaner stems, but apparently I am. I only need this inside space of the bottom of my cupboard to hold my paper.


I am a Use What's on Hand kind of girl; so a happy pie box holds yarn to make pom pom birds, a scrapbook binder to hold my patterns.


My Pattern binder is my crafting bible. A day does not end that I haven't pulled it out to retrieve or return a pattern to it's place. I love that one character will inspire another.


Tucked alongside my Hoosier is a pink dolls cupboard that has seen it's better day, but is just the place to hold crafting supplies used most frequently.


Every creative person needs a special spot to sit and ponder. Mine is a porch rocker under a beloved Christmas movie poster. It's colors and theme set an every day holiday mood.


Pillows for comfort, the Heart of Ohio a gift from the sweetest of blogging friends, Renee of My Vintage Mending . The afghan was made by Twyla of Two Crazy Crafters.


A lampshade I embroidered to read beneath, a little chef shaker tassel to remind me of my daughter's culinary days. Girl Friday? A signature tag line seen in my paper art.


A most frivolous purchase that had to be made, a battered red magazine rack for my Go-to issues of Mary Englebreit's Home Companion.


Also red and so special to me, is this peg rack that holds so many of the tags of women who have been kind enough to share their paper art with me as well as their friendship. Smiling here, this peg rack always does this for me.


Another surface for displaying cute, a "borrowed" trellis to change with the seasons. Ribbon used most frequently is kept in these three plastic jars.


A banner from Holly, Cutie Pie Cottage for the Friendship Garland I will hang to remind me of the women who most inspire me in this special place.


A top drawer contains my most used crafting supply, woolfelt from Joggles. A page from my pattern book lets me know whose presence is required next for holiday entertaining.


A second drawer contains vintage crafting elements, a third drawer Styrofoam and Paper Clay, a fourth shipping supplies.


I so enjoy looking at every single small detail of my own craft heroes, I do hope you are enjoying looking at the many details of my own creative space. The little canning jars will be Button Keeps for every month. I hope the readers of my blog will join in the fun of creating twelve different toppers and share them with us all.


Kept on the bottom shelf of this bookcase, a moment of silence please, are the familiar spines of the most wonderful magazine every published. What a joy Mary Englebreit has been to so many of our lives.


Nearing the homestretch now, a beloved craft desk with a view. A view of the wonderful Pennsylvania Dutch painted Hoosier and leafy Norwegian Maple brilliantly colored in the fall just over my shoulder. I love this space, I truly am my most happy self here. There are leaves on both sides of the table should more room be needed. The little oval table holds extra supplies as I work.


I create most effectively within the confines of a small space. It helps me to see the familiar in new ways. My crafting tools are basic and minimal in the hopes of demonstrating that creativity is not hampered by limited access to new supplies.


A Santa in July? His cheery presence can be felt throughout my crafting space.


His favorite color, mine as well.


A final corner cupboard holds finished crafts for Giveaways and for sale.


A ME style container holds vintage greeting cards. Their nostalgic graphics inspire my work.


A spice rack makeover keeps small items neat and tidy on the last wall spot available, hung just above the cutest squirrel bookcase ever.


We have finally made our way back to where it all began. A Bluebird cute as can be, Creative Breathing a place I am so happy to share.


Thank you very much Karen for the opportunity to participate in this wonderful exchange of creativity.