Showing posts sorted by relevance for query pom-pom. Sort by date Show all posts

Saturday, February 19, 2011

Pom Pom and Pattern Making Tutorial


I am so light of heart today. The sky is as blue as can be from my craft room window, and the grass is .... well the grass is green! Not a smidget of snow to be seen anywhere. The perfect day to respond to a readers request for a pom pom tutorial and a pattern how to.


I learned to make pom poms in Mr. Gardner's sixth grade class from popular girls sitting close by and make them in the same way to this day. Whatever will I do if they stop making cereal boxes? Two circles cut per pom, one slightly smaller for head pom.


My Halfway Woods best friend and I would make them by the dozens on Spend the Night days. Two yards yarn length repeated until amount equals six strands. Wrap around cardboard keeping six strands separated from each other and flat against cardboard. Another length of six strands will be needed.
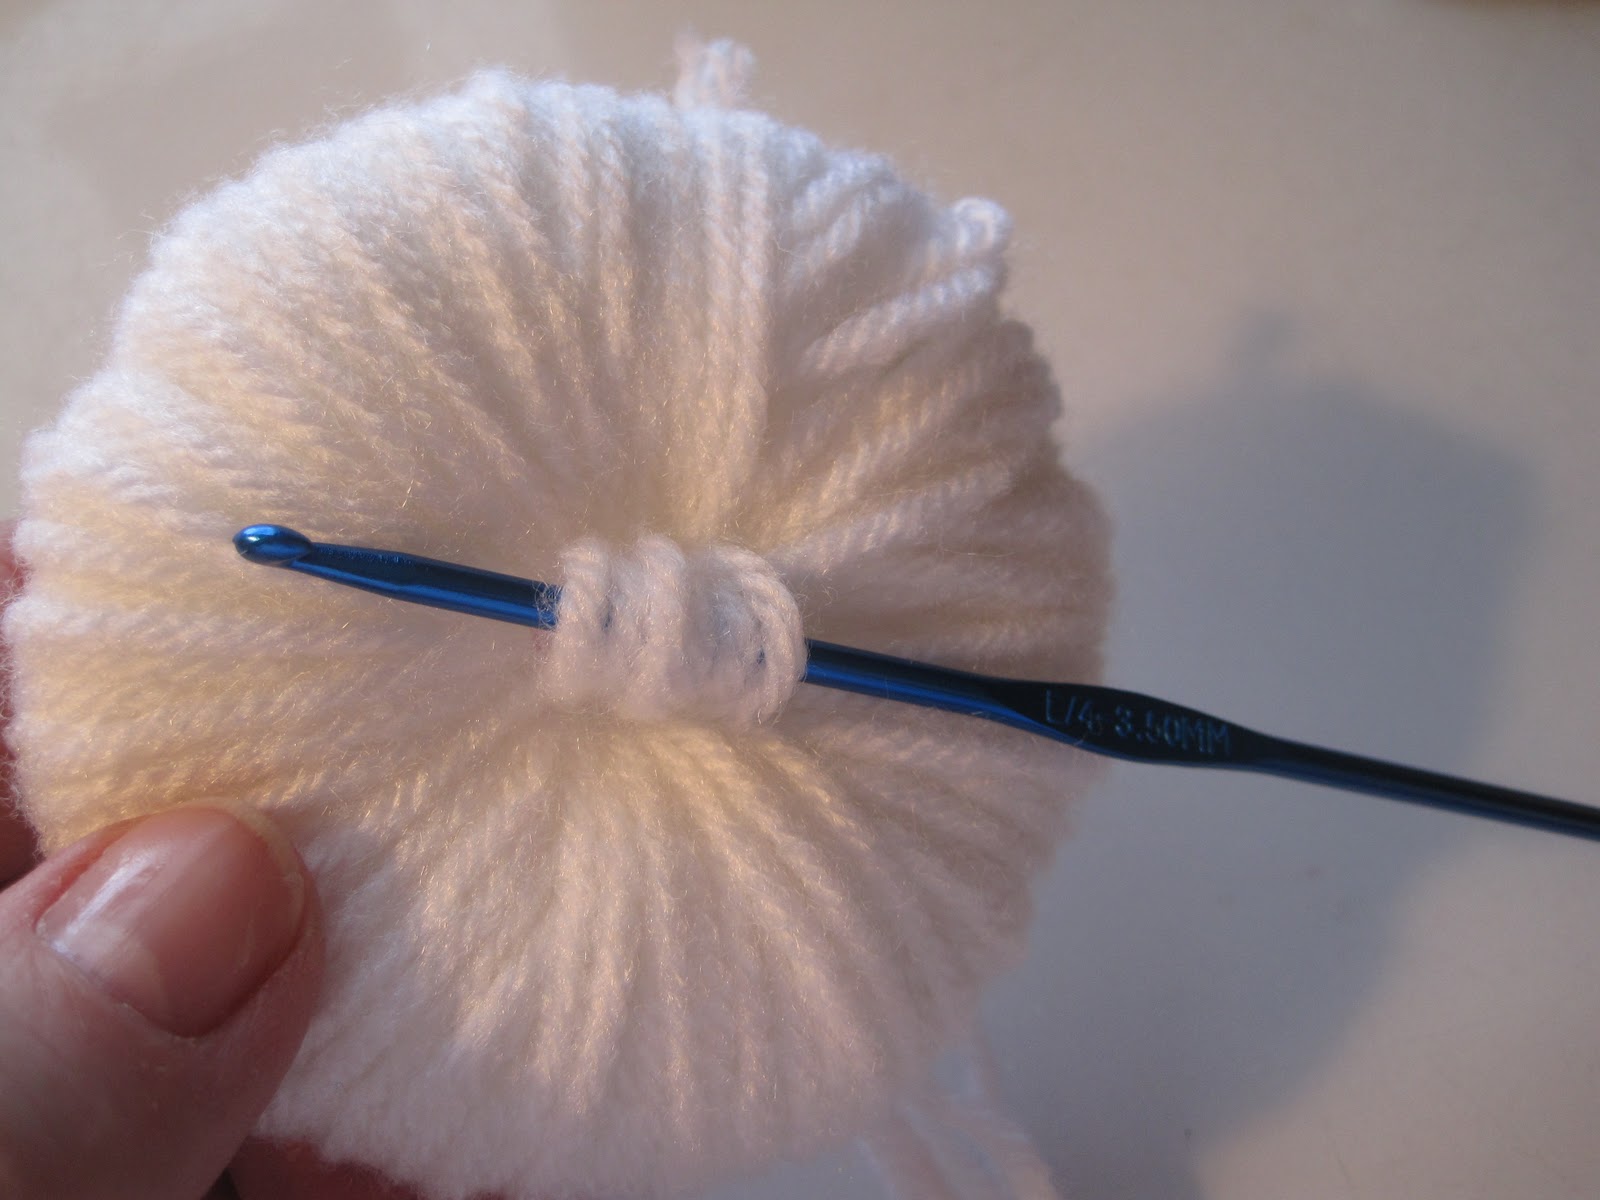

Our mother's hairdresser Miss Bernice sold our pom pom creations in her shop. This afforded us money to purchase more yarn to make more pom poms. A crochet hook makes pulling yarn through center easier as opening becomes smaller. When you can no longer pull yarn through, pom is ready to for next step.


Our pom making days would come to an end by the last day of the school year. Sherry would move to Washington state with her family. Heart broken letters to each other would be signed Hannibal Hays and Kid Curry for the remaining years of our childhood. Large scissors are used to cut through layers of yarn.


Sherry and I have now written each other for forty years. A length of yarn is inserted between cardboard rounds and tied snugly against yarn, repeat several times.


Sherry and I both were young women wanting to keep our world small. We would both meet the loves of our lives at about the same time. Sherry would meet Tom who happens to be a paraplegic, and I would meet Pat. Cardboard is removed. Trim pom to shape. Make second pom for head using same steps.


Sherry would be inspired to attend nursing school from her years of assisting Tom. It seems our lives have been lived in parallels. We both are employed in fields helping individuals with challenging disabilities. Poms are tied together with one strand of yarn from each. Repeat with second strand.


Do you think it is by chance we should each live at opposite sides of the Halfway Woods? A final trimming, and this little pom is ready for his uniform.


WARNING: Individuals who have received one of my pom pom characters in the mail always remark how surprised they are by their very large size. The lower body pom alone is larger than this medium sized pom character.


At this point the little bird can be done and be what I call a Snowbird. His feet, of course, are hidden in the snow!


Legs are created by twisting two pipe cleaner stems together for sturdiness. Half inch width of felt is wrapped around stem and held in place by twining floss around length and anchored at feet with several knots. Correct foot size is again determined by using jacket front piece.  Edges are blanket stitched together. Foot slipped in before last stitches are taken.


Oh my pom pom birds hate this step! A "U" shape is created with legs and hot glued between separated yarn. A thing stream of hot glue is applied on exposed  "U", yarn pressed together to hide unmentionables.


Handsome!


Totally handsome! It seems the preparation for another holiday celebration is underway in my craft room. A very busy place to be!


Tuesday, January 11, 2011

Special Delivery!


Do you know there is always a holiday party being planned in my craft room? The characters I create just can't seem to pass by any opportunity to celebrate the day that is special to them. A Valentine pom pom cute as can be delivers an invitation especially for you!


I know I love to create with felt because it is held in the hand and only floss is all you truly need to turn it into such cute things.


My oldest and dearest friend and I from the Halfway Woods made dozens and dozens of pom poms in grade school with little floral stamen antenna, googly eyes, and cardboard feet that looked like the logos on our brother's Hang Ten shirts.


My earliest memories of felt include making clothes for my troll dolls so they wouldn't always have to be naked. Bean shaped, two holes for the arms, a first pattern created. I have "prepared" all of my felt pieces for my pom pom. A little more attention to the hat is optional:


I have glued an inside hatband and slightly smaller circle to give the hat a crisper appearance. Tacky glue is used to adhere bill and hat trim.


Two pipe cleaners are twisted together(color does not matter)and bent at the ankles. Length of felt is distance between bends in pipe stems.


Three strands of floss, a few tacking stitches at the ankle, fold over felt and wrap with thread as you go down length of pipe stem. Secure with several more tacking stitches.


A "U" shape is created for the pom pom to rest.


A separation is made in the yarn for the bird to "sit" on legs. (I have the funniest story to share about my brother and his "sitting" area) Carefully apply a bead of hot glue in the center of yarn separation, set legs.


My mother's friend Miss Bernice who owned her own Beauty Salon was so charmed by our pom pom Martians she sold them in her shop to her patrons for a dime apiece. Our mother's couldn't buy enough yarn to keep up with our production.


I usually hand stitch my pom pom birds from start to finish, but hot glue is a fast alternative. Arms are ready to be glued in place.


Miss Bernice's was not unlike the beauty shop in Steel Magnolias. Lovelorn advice, beauty remedies, and to-die-for dessert recipes lovingly shared among women who became life long friends.


Oh My Gosh! Did you ever see such a cute mailman?


The snow is falling, falling outside my craft room window. A Special Delivery day, a smile in the heart.


Pattern same for Special Delivery Stork
Please do not Pin pattern to Pinterest

Thursday, November 4, 2010

Peppermint Pom Pom


I can't help but smile at this little Peppermint Pom Pom inspired by the most beautiful colors of Cosmo Crickets new paper line, Mitten Weather.


I am not a purple kind of girl, but combined with these unexpected shades, well...... they are just beautiful!


I do believe this is the first girl craft I have made. She is causing quite the stir in my craft room. The "boys" aren't too sure about sharing their domain!


Right click on image, View Image, File, Print Preview, choose percentage that is right for you!


A banner made another pom pom created.


How cute is this little fella bundled in his warm scarf against the cold.


Well I guess you would be cold if you were standing atop a snowball! TOO CUTE!

Monday, May 28, 2012

Pom Pom Girl


 I absolutely loved growing up in my hometown of Friendly, Maryland. I lived on Old Allentown Road, the road to take if you were going any place important. It took me upon my bicycle each morning to Friendly Sr. High School, home of the best football team in the county, The Patriots. We were the Bicentennial Class of 76, our school colors; red, white, and blue.


Fridays in the fall were my very favorite days at school when we would be dismissed early to attend home games. I loved everything about Fridays from buying my ticket at lunch to sitting in the stands as close to the Pep Squad as I could. I wanted so badly to join, but this was the last chance group, and I did not want to be a last chance girl.


 I would look longingly at the uniforms of the Pom Pom Girls. These were the most popular and attractive girls in school. They wore short navy blue sleeveless shifts, white short boots with red tassels, and carried over sized red pom poms. They were the Size 5 girls.


There were also the cheerleaders, the band, and leading everyone, our Majorette, Bonnie. She had the straightest, most beautiful honey-colored hair that hung below her waist. She had such a beautiful face. Bonnie was also very heavy through her waist. At each football game she would lead the band in her red sequined costume not at all bothered by her rather egg shaped body and skinny legs. She was a magnificent twirler never missing her high toss. She smiled so beautifully despite taunts from the boys in the crowd about her shape.


Watching Bonnie on Fridays changed my life. If she could be confident enough to present herself in front of an entire school in a leotard, I could muster the courage to join the Pep Squad. I signed the join-up sheet and wrote Size 11 by my name. This was the group for size 11's. Our uniform was a twisty twirl red skirt to the knees, a navy blue sleeveless vest, a white button down shirt, white knee socks, and saddle shoes.

 
I was never so happy than on Fridays. Our school won the State Championship, I was there in my uniform. I thank Bonnie for this.


WISHING YOU A VERY HAPPY MEMORIAL DAY!


Saturday, November 6, 2010

Peppermint Sledding Ornament


How sweet are these little ice skating ornaments for Vivian's swap! They look as though they are preparing to step on the ice of a skating extravaganza.


Chilly and wonderfully cold today, a perfect day to begin working on my Peppermint Sledding Ornaments. Oh my! so many steps with such tiny pieces.


Simply sweet faces painted, the backs of paint brushes used to make dots.


The same pattern pieces are used as were with the ice skating ornament. Use Tacky Glue to adhere white felt trim. White snow glitter would also be wonderful for the edging. Allow to dry.


A dab of hot glue at center of neckline. Slightly overlap back of dress, hot glue as well. Bow: 2 strands floss thread through first pom, tie bow leaving needle on thread, thread second pom, cut ends. Use Tacky Glue to adhere to collar of dress. After boots are glued on, legs will be crossed as though sitting.


Cut chenille arms slightly longer than sleeves, hot glue to back of sleeve. Free cut mittens and hot glue in place. Crook wrist to rest on sled edge. Boot: Apply small amount of hot glue to back of stem, place in center of boot piece, apply hot glue to one side of boot and fold over to meet other sandwiching between your fingers. Use sharp scissors to cut away any glue showing. Hot glue pearl beads in place. Fold legs. Head piece: a little cone hat would be cute or silver tinsel. I have cut a strip of felt and snipped away the back of a pom to make it flat. Hot glue is used.


 A 1/3rd measuring cup is just the size to create the sledding saucer. Trace on folded over foil with pencil (makes easier not to tear). I have placed foil circle inside a bowl shape and used my fingers to give foil a bit of a lip for tinsel stem to be added. Size is the same as circumference of measuring cup. Snip excess. Hot glue to foil.


First one to the bottom!